Call Transfer Workflows: A Complete Operational Guide
Call transfer workflows are the operational and technical steps that move an active call from one endpoint, agent, or queue to another. They come in four main forms: warm (attended), cold (blind), voicemail, and queue/park transfers. For CX-sensitive calls, warm transfers are the default worth recommending. Cold transfers make sense when speed matters more than context continuity. Voicemail and queue fallbacks cover after-hours gaps and overflow spikes.
The right choice depends on three variables: how much context the receiving party needs, how available they are, and how much the caller’s experience will suffer if they have to repeat themselves. CSAT drops measurably when customers repeat information, which makes context continuity the deciding factor in most transfer decisions.
Key Takeaways
Warm transfers are the default for CX-sensitive calls because they preserve context; cold transfers work when speed matters and automated context delivery is in place.
| Point | Details |
|---|---|
| Default transfer choice | Use warm (attended) transfers for escalations, complex issues, and high-value accounts to protect CSAT. |
| Cold transfers with context | Cold transfers are acceptable when your platform pushes a CRM screen-pop or interaction summary to the receiving agent automatically. |
| SIP protocol reference | RFC 5589 defines REFER and Replaces headers for basic and attended SIP transfers; test REFER pass-through with your SIP trunk before deploying. |
| Metrics that matter | Track transfer-induced callbacks and AHT delta on transferred calls, not just transfer rate, to find the real cost of poor handoffs. |
| Loan Officer AI | Loan Officer AI attaches full borrower context to every transfer event, reducing repeat contacts for mortgage teams handling warm transfer leads. |
Table of Contents
- What is a call transfer and how does it differ from forwarding, parking, and queuing?
- What are the main types of call transfers?
- How does a live call transfer actually work, step by step?
- How do SIP and protocol-level mechanisms handle transfers?
- When should you use each transfer type?
- How do you perform a transfer on any device or platform?
- What scripts and etiquette rules produce better transfer outcomes?
- Which metrics tell you whether your transfer workflows are working?
- Four workflow templates you can drop into your SOPs today
- The part of transfer workflows most teams get wrong
- Loan Officer AI and call transfer context for mortgage teams
- Sources
What is a call transfer and how does it differ from forwarding, parking, and queuing?
A live call transfer is an active session handoff: an agent or system moves a connected call to a new endpoint while the caller stays on the line. The original agent typically drops off once the transfer completes.
Call forwarding is different. It redirects an incoming call before it connects to the original destination, usually based on a rule (busy, no answer, time of day). No agent is involved in the handoff. Call parking places a call in a shared hold slot that any authorized agent can retrieve by dialing a code. Call queuing holds callers in a waiting pool until an agent becomes available, without any active agent initiating the move.
VoIP transfers shift active calls between users without disconnecting the caller, and when paired with context-preserving tools, they can improve first-call resolution (FCR) compared to forcing a callback.
Transfers appear in contact-center workflows in several places:
- Escalations from a frontline agent to a supervisor or specialist
- Receptionist-to-department handoffs in enterprise PBX environments
- Skill-based routing corrections when an IVR misroutes a caller
- Warm handoffs between sales and support teams on the same call
- After-hours fallbacks to voicemail or an on-call queue
What are the main types of call transfers?
Warm (attended) transfers
A warm transfer, also called an attended or consultative transfer, means the transferring agent briefs the receiving agent before connecting the caller. The caller waits on hold for a short consult, then gets connected to someone who already knows their situation. NiCE notes that warm transfers preserve caller context through that brief agent-to-agent exchange, while cold transfers offer speed at the cost of potential context loss.

Cold (blind) transfers
A cold transfer, also called a blind transfer, routes the caller directly to the target without any agent-to-agent consultation. The transferring agent dials the destination and disconnects. Fast, but the receiving agent starts from zero. MightyCall highlights that blind transfers can speed throughput during volume spikes but increase repeat-contact risk unless context is automatically delivered to the receiving agent.
Voicemail transfer
The transferring agent routes the caller directly to a voicemail box, either because the target is unavailable or because the caller’s request is better handled asynchronously. The caller leaves a message; a callback is expected.
Transfer to queue or park
The agent places the caller into a named queue (where the next available agent picks up) or parks the call in a shared slot for a specific agent to retrieve. Queue transfers work well for overflow; park transfers suit brief holds where the same agent or a known colleague will reconnect.
| Transfer Type | CX Risk | Time Cost | Context Required? | Best For |
|---|---|---|---|---|
| Warm (attended) | Low | Higher | Yes | Escalations, high-value accounts |
| Cold (blind) | Higher | Low | No (or automated) | High-volume spikes, simple routing |
| Voicemail | Medium | Low | No | After-hours, async requests |
| Queue/Park | Low to medium | Variable | Partial | Overflow, specialist availability |
Use-case quick reference:
- Escalation to supervisor: warm transfer, always
- High-value account with complex history: warm transfer with CRM screen-pop
- High-volume inbound spike, simple inquiry: cold transfer with automated context push
- After-hours or unavailable agent: voicemail transfer with callback tag
- Overflow to next available agent: transfer to named queue
How does a live call transfer actually work, step by step?
The sequence below applies to attended transfers. Cold transfers skip steps 3 and 4.
- Place the caller on hold. The agent presses hold or activates a hold state. The telephony platform sends a SIP re-INVITE with
a=inactiveora=sendonlyto pause the RTP media stream to the caller. - Dial the transfer target. The agent dials the destination extension, DID, or queue number. The platform initiates a new SIP INVITE to the target.
- Consult with the receiving agent. The transferring agent briefs the receiving agent: caller name, account ID, issue summary, and any action already taken. Keep this under 30 seconds.
- Confirm readiness. The receiving agent signals they are ready. A verbal “ready” or a UI button press is the standard cue.
- Execute the transfer. The agent triggers the transfer action. The platform sends a SIP REFER to the caller’s UA (user agent), instructing it to send a new INVITE to the target. The RTP stream updates to flow between the caller and the new agent.
- Verify connect and disconnect. The transferring agent confirms the caller and receiving agent are connected, then drops off. The platform logs the transfer event.
Failure recovery: If the target is unreachable (busy, no answer, rejected REFER), the platform should return the call to the transferring agent or route it to a fallback queue. Never leave a caller in a dead hold state. Tag the failed transfer attempt in the call log with a reason code so operations can track misroute patterns.
GetVoIP explains that during a VoIP transfer, the hold, dial-target, confirm, and bridge steps each update call state and RTP media streams, which is why a failed REFER can strand a caller if the telephony platform lacks a proper fallback policy.
Pro Tip:Configure your telephony platform to automatically return a call to the originating agent’s queue after 15–20 seconds of no answer at the transfer target, rather than routing to a generic fallback. Callers who return to a familiar queue have measurably shorter handle times on the retry.
How do SIP and protocol-level mechanisms handle transfers?
RFC 5589 is the definitive reference for SIP call transfer. It defines three transfer models: basic transfer (REFER only), consultation-hold transfer (hold + new dialog + REFER), and attended transfer (two established dialogs merged via Replaces).
REFER and Replaces in practice
In a basic (cold) transfer, the transferring UA sends a REFER to the caller’s UA with a Refer-To header pointing to the target. The caller’s UA sends a new INVITE to that target and reports progress back via NOTIFY messages.
In an attended transfer, the transferring agent first establishes a consultation dialog with the target. Once both dialogs are active, the agent sends a REFER with a Refer-To header that includes a Replaces parameter. That parameter carries the dialog identifiers (Call-ID, to-tag, from-tag) of the consultation dialog, instructing the caller’s UA to replace the consultation dialog with a direct connection to the target.
Implementation caveats
GRUUs: Globally Routable User Agent URIs (GRUUs) are needed so the REFER’s Refer-To header points to a specific dialog, not just a UA. Without GRUUs, the Replaces header may match the wrong dialog on multi-device setups.
Target-dialog support: RFC 5589 recommends the Target-Dialog header to help the recipient identify which dialog the REFER applies to. Not all PBX vendors implement this, which causes attended transfer failures on mixed-vendor deployments.
Media handling: After a successful REFER, the RTP stream must be re-negotiated between the caller and the new target. Some PBX platforms hold the media anchor at the B2BUA (back-to-back user agent) rather than releasing it, which adds latency and a potential single point of failure.
Interoperability: Cisco Unified Communications Manager, Avaya Aura, and many hosted PBX platforms implement REFER with vendor-specific extensions. Test attended transfers explicitly across every endpoint type in your environment before deploying at scale.
Pro Tip:Check your SIP trunk provider’s feature list for REFER pass-through support. Many carriers block or rewrite REFER at the border, forcing your PBX to handle the transfer internally. A VoIP feature checklist for your specific platform will surface this before it becomes a production issue.
When should you use each transfer type?
The decision comes down to four variables: sensitivity of the caller’s situation, complexity of the issue, availability of the target, and acceptable handle time.
If the issue is complex or the caller is frustrated: use a warm transfer. The 20–30 second consult pays for itself in reduced repeat contacts.
If the issue is simple and the target queue is named and monitored: a cold transfer is fine, provided your platform pushes a CRM screen-pop or interaction summary to the receiving agent automatically. Bland AI notes that a structured consult before handoff reduces clarifying questions and improves FCR, but AI-generated interaction summaries can replicate that context delivery even in a cold transfer.
If the target is unavailable and the request is not time-critical: route to voicemail with a callback tag. Set a callback SLA and log it.
**If volume is spiking and no specific agent is required, transfer to a named queue. Avoid generic queue names like “general” or “overflow” — agents picking up from those queues have no context about why the call arrived.
Hybrid option: automated context push on cold transfers. When your IVR or ACD captures caller intent and account data before the agent picks up, a cold transfer can carry a screen-pop with full interaction history. This gives the receiving agent warm-transfer-quality context at cold-transfer speed, which is the right tradeoff during high-volume periods.
CallMiner’s automation guidance points out that IVR, ACD, and skill-based routing often implement transfers as automated workflow actions, and the supervised vs. automated choice should be driven by call complexity and CX requirements.
How do you perform a transfer on any device or platform?
The steps below are platform-agnostic. The button labels differ across Cisco, Polycom, Avaya, Zoom Phone, and Microsoft Teams, but the sequence is the same.
Desk phones
- Press Hold or the transfer soft key.
- Dial the target extension or DID.
- Wait for answer (warm) or press Transfer immediately (cold).
- Announce the caller and confirm readiness (warm only).
- Press Transfer or Complete to bridge.
Softphones and mobile apps
- Tap Hold in the active call screen.
- Open a new call or use the built-in transfer dialog to dial the target.
- Complete the consult or skip it for a blind transfer.
- Tap Merge, Transfer, or Complete Transfer depending on the app.
PBX consoles and supervisor dashboards
Most PBX consoles (Cisco Finesse, Avaya CMS, Genesys Cloud) offer a drag-and-drop or right-click transfer from the active call panel. Use the supervised transfer option for warm transfers; use the direct transfer option for cold.
Pre-transfer checklist
Before executing any transfer, confirm:
- Caller identity has been verified (account number, last four digits, security question)
- You have permission to transfer (caller has agreed, not been surprised)
- Relevant ticket or CRM record is open and updated with the current issue
- Target agent or queue is available and appropriate for the request
- You have a fallback plan if the target is unreachable
Quick troubleshooting
- Call dropped during transfer: check REFER support on your SIP trunk; confirm the platform has a fallback policy for failed REFERs
- Caller stuck on hold after transfer attempt: the target UA may have rejected the REFER; return the call manually and retry or route to queue
- Misrouted transfer: review queue naming conventions and agent skill assignments; log the misroute with a reason code
What scripts and etiquette rules produce better transfer outcomes?
The most-cited driver of poor CSAT is forcing customers to repeat information. Warm transfers act as a context bridge that reduces that friction, according to NiCE’s transfer guidance. The scripts below are designed to prevent that.
Permission script (to caller)
One-line problem summary (agent to agent, during consult)
Readiness confirmation
The receiving agent says “Ready” or presses a UI cue. Call Centre Helper recommends making this a mandatory, auditable step in QA scoring. A transfer that completes without a readiness confirmation is a QA failure, not a minor omission.
Handoff phrasing (to caller)
Etiquette rules
- Always ask permission before transferring. Surprising a caller with a hold state damages trust.
- Keep the consult under 30 seconds. Longer consults frustrate the caller waiting on hold.
- Set expectations: tell the caller how long the hold will be and who they are going to.
- Never transfer a caller who has already been transferred twice without escalating to a supervisor instead.
Pro Tip:Embed the one-line problem summary template directly into your agent desktop as a pre-transfer note field. When agents type the summary before initiating the transfer, it auto-populates the CRM record and the receiving agent’s screen-pop. This turns a behavioral coaching point into a system-enforced habit.
Which metrics tell you whether your transfer workflows are working?
Call Centre Helper and MightyCall both point to the same core KPI set for transfer quality. Here is how to read each one.
Transfer rate: the percentage of calls that include at least one transfer. Investigate queue naming and IVR logic first.
Blind vs. attended split: the ratio of cold to warm transfers. A high blind-transfer proportion in a CX-sensitive environment is a red flag. Track it by queue and by agent.
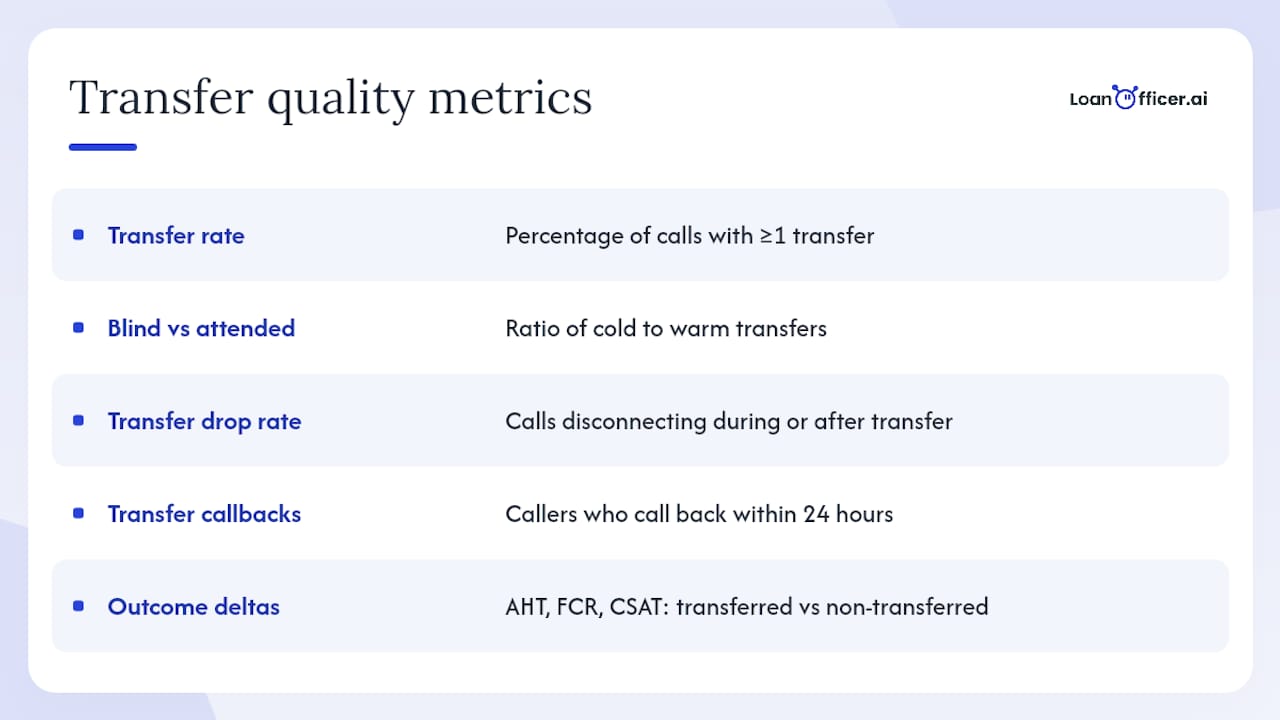
Transfer drop rate: calls that disconnect during or immediately after a transfer.
Transfer-induced callbacks: callers who call back within 24 hours after a transfer. This is the clearest signal that the transfer failed to resolve the issue. Track it separately from general repeat contacts.
AHT delta: the difference in average handle time between transferred calls and non-transferred calls.
FCR delta: first-call resolution rate for transferred calls vs. non-transferred calls. A gap here confirms that transfers are creating resolution failures, not just routing events.
CSAT delta: post-call satisfaction scores for transferred vs. non-transferred calls. This is the outcome metric that ties everything together.
Common pitfalls
- Overusing blind transfers in escalation queues where context is mandatory
- Stale queue names that no longer match the team’s actual function
- Missing CRM notes on transferred calls, leaving the receiving agent to re-interview the caller
- No fallback policy for failed transfers, leaving callers stranded on hold
Remediation thresholds
If CSAT delta exceeds 0.5 points (on a 5-point scale), run a QA review of the last 50 transferred calls and score them against the readiness-confirmation and permission-ask criteria.
Four workflow templates you can drop into your SOPs today
Template A: Warm (attended) transfer
- Verify caller identity.
- Open the CRM record and note the issue in the transfer summary field.
- Place caller on hold: “I’m going to place you on a brief hold while I connect you.”
- Dial the target agent or extension.
- Deliver the one-line summary: “I have [Name], account [ID], calling about [issue]. They’ve already [action]. Ready?”
- Receive “Ready” confirmation.
- Bridge the call: “[Agent Name] is ready for you now. I’ve briefed them, so you won’t need to repeat anything.”
- Drop off and log the transfer in the CRM with outcome tag.
Script timing target: consult in 20–30 seconds. Bland AI’s research confirms that keeping the consult within this window reduces the need for customers to repeat information.
Template B: Cold (blind) transfer
- Before transferring, complete the CRM note with: caller name, account ID, issue summary, and any action already taken.
- Confirm the destination queue is active and correctly named.
- If your platform supports it, trigger an automated screen-pop or interaction summary push to the receiving agent.
- Inform the caller: “I’m connecting you to [Team/Name] now. They’ll have your information.”
- Execute the blind transfer.
- Log the transfer attempt with a “cold transfer” tag and the destination queue name.
Template C: Transfer to queue or park
- Confirm the queue name matches the caller’s need (not a generic overflow queue).
- Check queue depth and estimated wait time if your platform exposes it.
- Inform the caller: “I’m placing you in the [Queue Name] queue. Estimated wait is approximately [X] minutes.”
- Execute the queue transfer.
- Set a queue timeout rule: if the caller is not picked up within [X] minutes, route to voicemail or return to the IVR.
- Log the queue transfer event with the queue name and timestamp.
Template D: Voicemail transfer or fallback
- Confirm the target is unavailable and the request is appropriate for async handling.
- Inform the caller: “[Name] is unavailable right now. I’ll connect you to their voicemail so you can leave a message, and they’ll call you back within [SLA timeframe].”
- Transfer to the voicemail box.
- Tag the call in the CRM as “voicemail transfer” with a callback SLA timestamp.
- If the platform supports it, trigger an automated callback reminder to the target agent.
The part of transfer workflows most teams get wrong
The conventional wisdom on call transfers focuses on the warm vs. cold decision as if it were the whole problem. It is not. The real failure point is what happens to the information after the transfer completes.
Most contact centers track transfer rate. Far fewer track transfer-induced callbacks or AHT delta on transferred calls. Those two metrics are where the actual cost lives. That is not a transfer-type problem. It is a context-delivery problem.
The fix is not always switching from cold to warm transfers. Sometimes it is building the context delivery into the cold transfer itself: a CRM screen-pop, an automated interaction summary, a pre-populated note field the agent sees the moment the call arrives. When that context travels with the call, the receiving agent does not need a 30-second consult to get up to speed.
The teams that improve CSAT fastest on transfer workflows are the ones that treat the CRM record as part of the transfer protocol, not an afterthought. Every transfer should close a note and open a task. That discipline, more than any script, is what reduces repeat contacts.
Pilot one workflow template for one week. Measure transfer-induced callbacks before and after. The number will tell you more than any QA audit.
Loan Officer AI and call transfer context for mortgage teams
Mortgage loan officers handle some of the most context-sensitive calls in any industry. A warm transfer mortgage lead arriving at a loan officer’s desk without account history, rate discussion notes, or prior contact summary is a near-certain repeat contact. That is the exact problem Loan Officer AI is built to prevent.
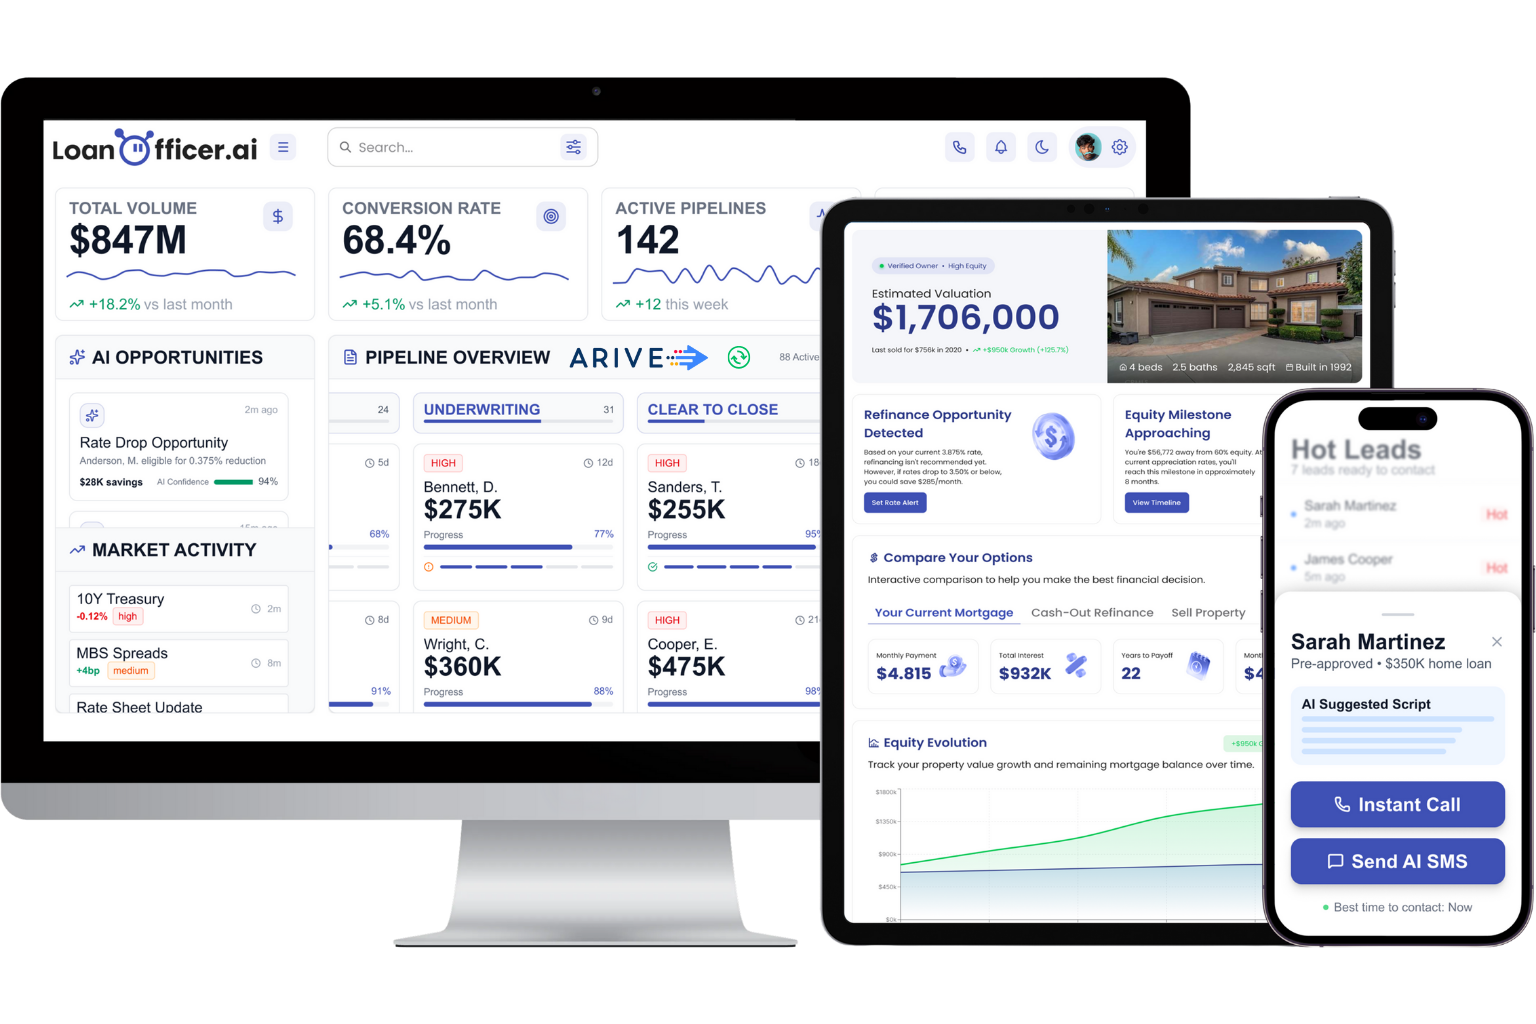
Loan Officer AI’s AI-powered mortgage CRM attaches full interaction history, pipeline status, and borrower context to every contact record, so when a call transfers to a loan officer, the receiving party sees the complete picture before they say hello. The smart dialer and automated follow-up features mean that transfer events trigger the right next action automatically: a follow-up task, a pipeline stage update, or a rate-monitoring alert tied to the borrower’s profile. For loan officer teams managing warm transfer mortgage leads across multiple originators, that context continuity is the difference between a closed loan and a lost one. Try Loan Officer AI and see how automated context delivery changes your transfer outcomes.
Sources
- Warm Transfer vs. Cold Transfer Explained | NiCE
- What Is a Warm Transfer in a Call Center? (Bland AI)
- VoIP Call Transfer: How it Works, Types & Features
- What Is a Blind Transfer? Examples & Best Practices – MightyCall
